VMEsxiのCentOS6にORACLEサーバをインストール
アフィリエイト広告を利用しています
このページの内容が役に立ったら X (旧twitter) でフォローして頂けると励みになります
挨拶や報告は無しで大丈夫です
02.インストール
CentOS6
oracle11gr2.alt
ORACLEサーバインストール
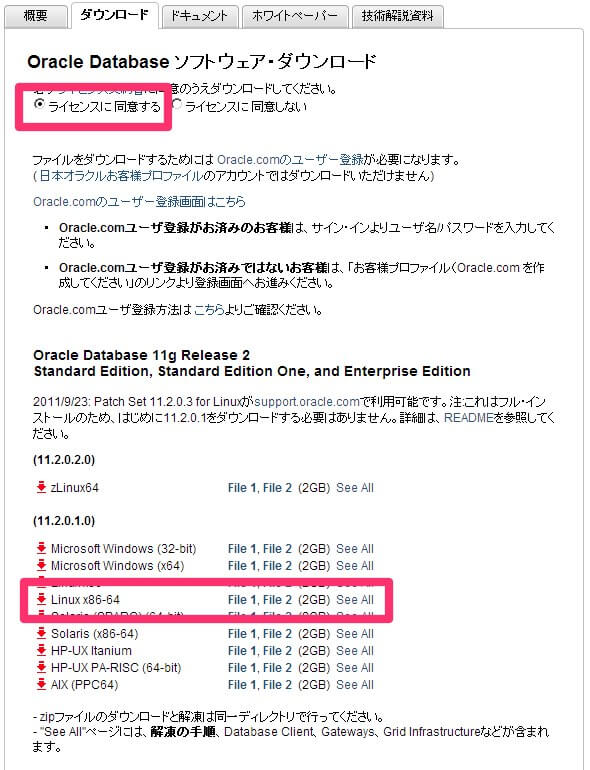
データベースのダウンロード
http://www.oracle.com/technetwork/jp/database/enterprise-edition/downloads/index.html
サーバに設置
# cd /tmp
# mv /tmp/linux.x64_11gR2_database_1of2.zip /usr/oracle/tmp/linux.x64_11gR2_database_1of2.zip
# mv /tmp/linux.x64_11gR2_database_2of2.zip /usr/oracle/tmp/linux.x64_11gR2_database_2of2.zip
# chown oracle:oinstall /usr/oracle/tmp/linux.x64_11gR2_database_1of2.zip
# chown oracle:oinstall /usr/oracle/tmp/linux.x64_11gR2_database_2of2.zip
VMEsxiのビデオメモリを確認しておく
小さければシャットダウンして設定。
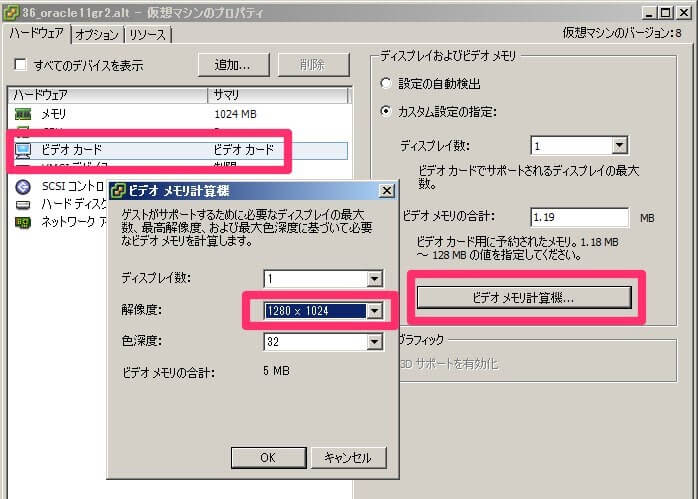
VMEsxiのコンソールから作業
# su oracle
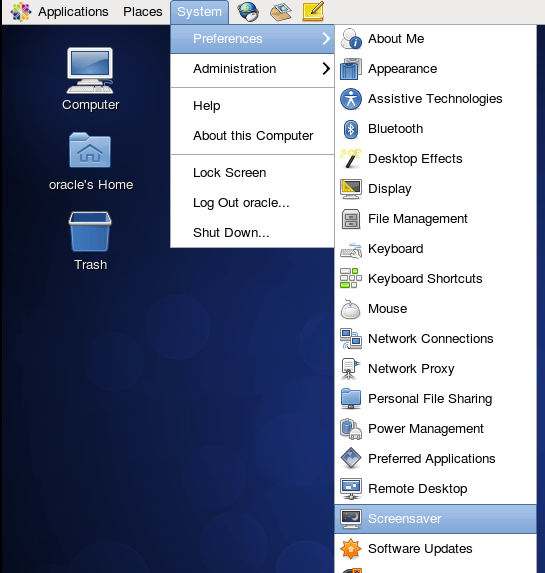
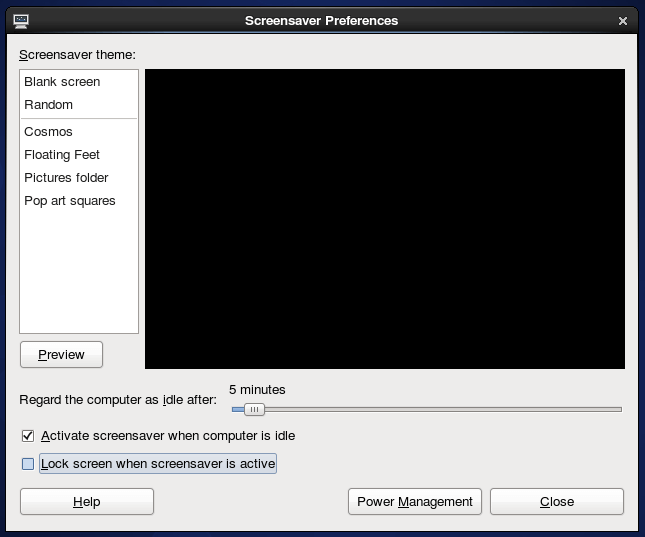
$ startx- 画面解像度の調整をしておく。
- スクリーンセーバの解除
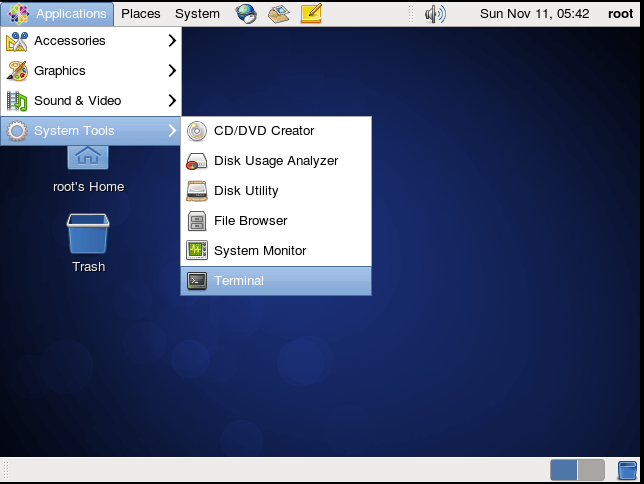
ターミナルを起動
$ cd
$ cd tmp
$ pwd
$ unzip linux.x64_11gR2_database_1of2.zip
$ unzip linux.x64_11gR2_database_2of2.zip
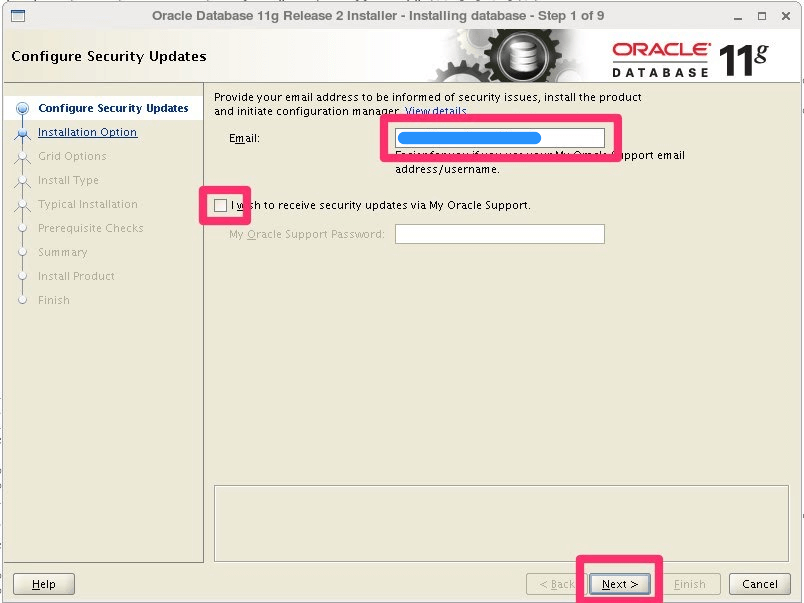
$ ./database/runInstallerメールを入れて、チェックを外して、Next
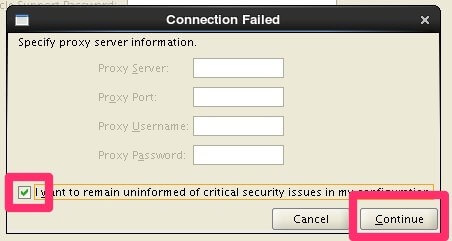
チェックして、continue
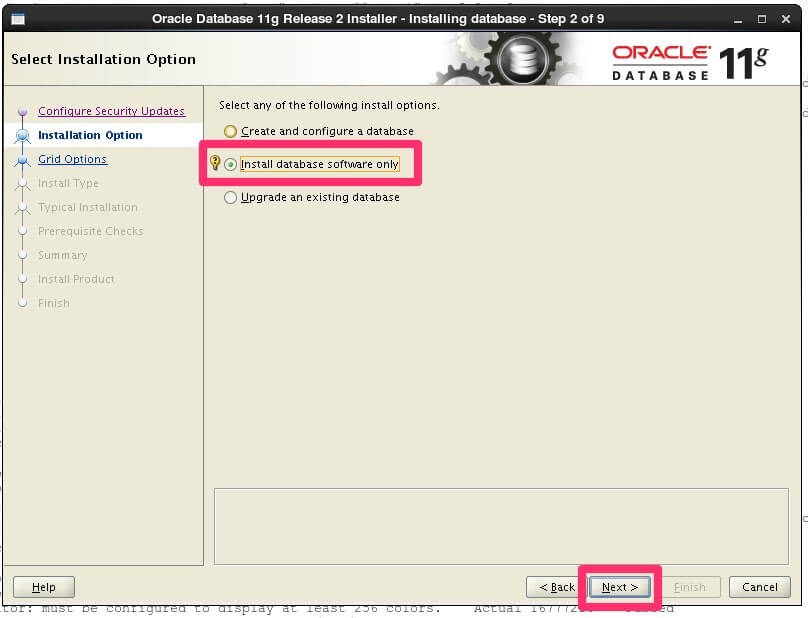
真ん中を選択して、Next
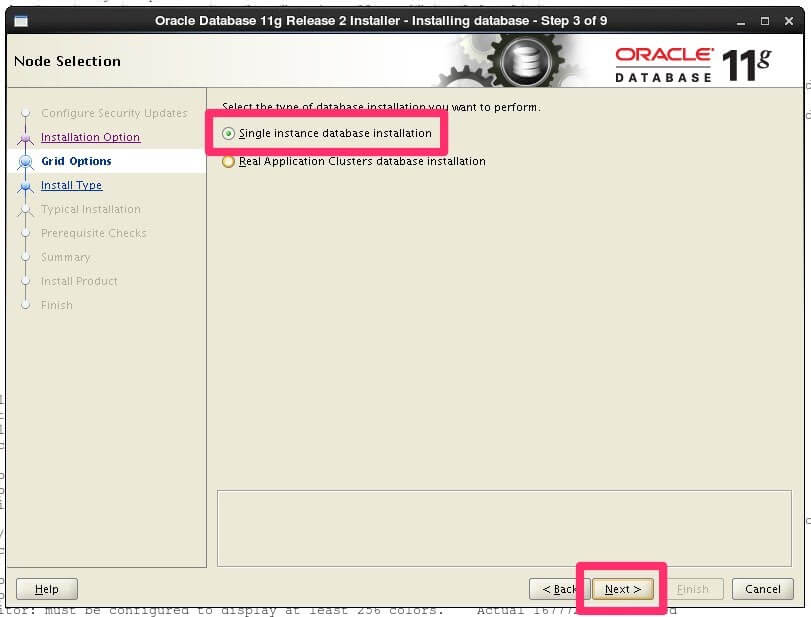
上側を選択して、Next
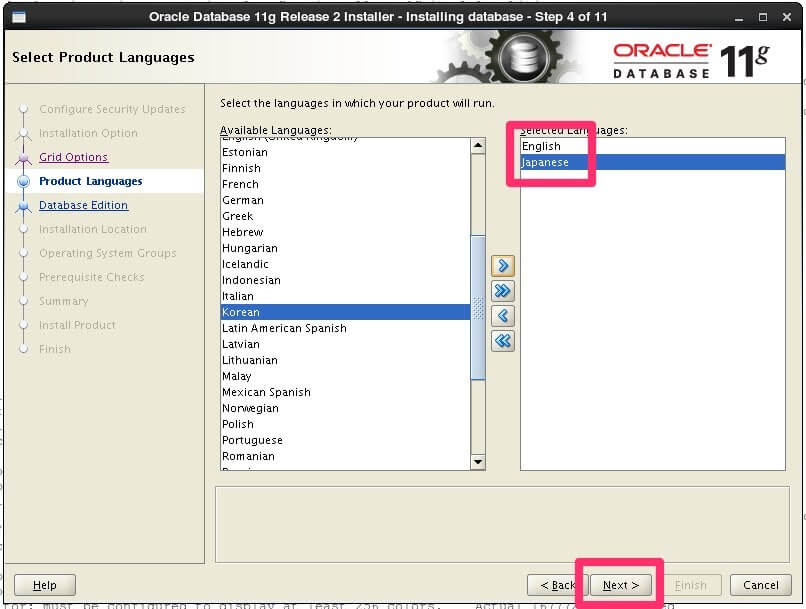
日本を追加して、Next
Enterprise Editionを選択して、Next

そのままNext
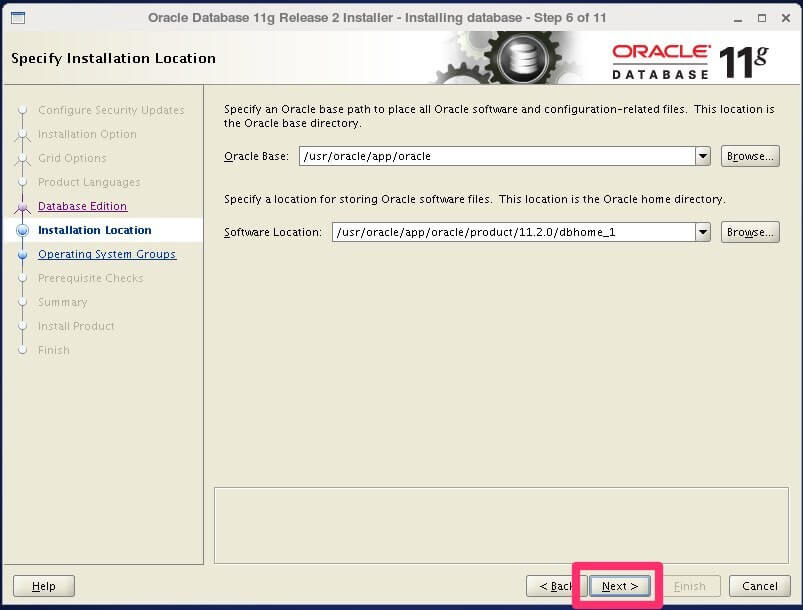
そのままNext

そのままNext

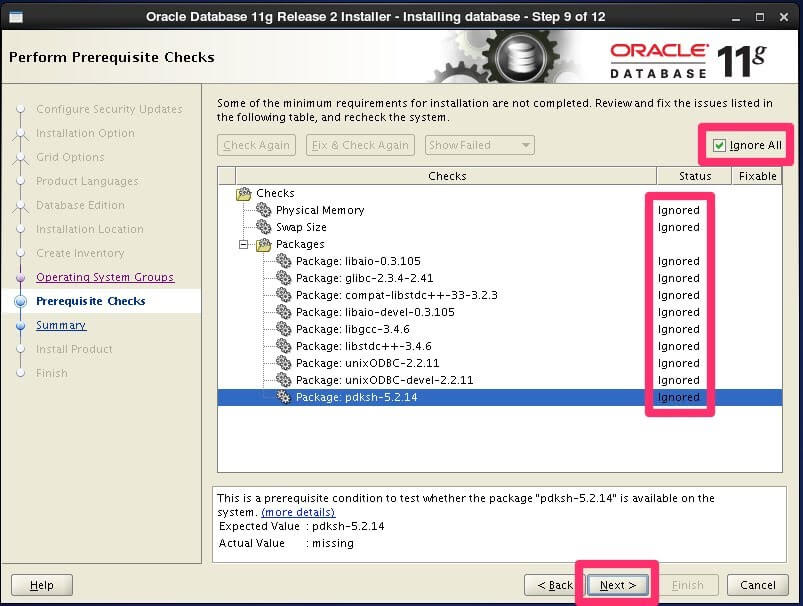
Ignore All して、Next
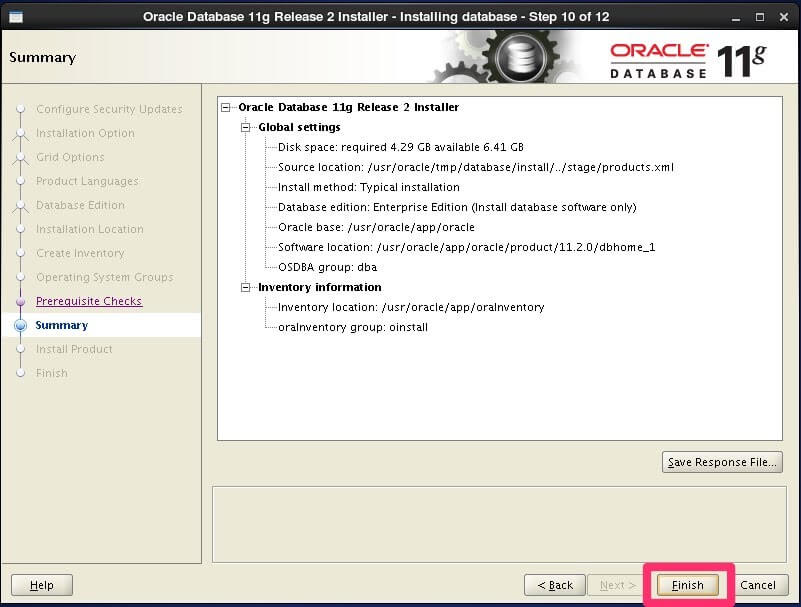
Finish
ターミナルを新しく起動して実行

次の画面で、Close で完了。
$ vi ~/.bash_profile

# 最終行に追記
export ORACLE_BASE=/usr/oracle/app/oracle << こっちに直しておく

export ORACLE_HOME=$ORACLE_BASE/product/11.2.0/dbhome_1
export PATH=$PATH:$ORACLE_HOME/bin

$ source ~/.bash_profile
$ rm -rf tmpこのページの内容が役に立ったら X (旧twitter) でフォローして頂けると励みになります
本ページの内容は可能な限り正確な情報を提供するよう努めていますが、内容の正確性・最新性・安全性を保証するものではありません。本情報を利用して生じたいかなる損害についても、当方は一切の責任を負いません。実施にあたっては必ずご自身の判断と自己責任にてお願いいたします。